Easy steps to make a sourdough starter from scratch
By Monica Worsley · Published 28 April 2020
Easy Steps To Making A Sourdough Starter From Scratch
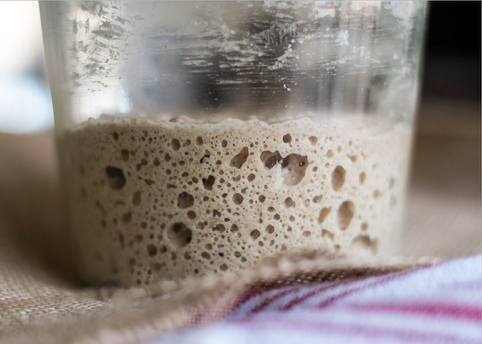
How does one begin the journey of making naturally leavened bread? It starts with, well, making an incredible sourdough starter from scratch.
A healthy sourdough starter means great bread.
Despite all the mysticism and lore about creating the concoction, when broken down, it’s merely a naturally fermenting mixture of flour and water. Add water to dry flour and let it sit on the counter for a few days, and you’ll see nature weave life into a once lifeless lump: bubbles will appear, and the mixture will rise. This natural fermentation can be harnessed, and, once stable, controlled to produce bread so flavourful and healthy that it’s hard to go back to anything else.
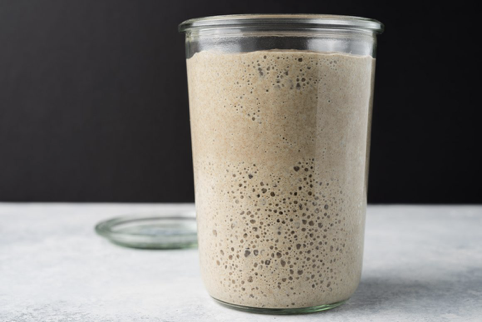
I created my sourdough starter years ago, and it’s the same one I use to this day. It’s a spoiled brat now, to be sure, but in exchange for my attention and flour, it stays on schedule. Initially, it was the quintessential rebellious child. Sometimes it wouldn’t show any fermentation activity, and at other times it was utterly unruly. Back then I didn’t realise what it needed to thrive. I didn’t see how vital timely refreshments (also called a feeding, where we mix in fresh flour and water) were, or how much temperature impacts fermentation. The key to raising a well-adjusted starter is to be observant of its needs, give it space to grow, and adjust refreshments to encourage maximum fermentation activity. A healthy starter means great bread.
A Few Tips Before We Begin
Water that’s high in chlorine or chloramine (disinfectants used by some cities to clean tap water) can impede fermentation. Before starting this process, fill a large jug with tap water and let it sit out uncovered overnight to allow any chlorine dissipate. If your city uses chloramine instead of chlorine, letting a jar sit out overnight will not work. In this case, you’ll have to look into reverse osmosis filters or other carbon filters.
Alternatively, you could use bottled or distilled water until you get your starter fermenting reliably, then try switching back to tap water with a portion to see if it’s able to handle the tap water.
After you put your starter mixture in the jar, you will keep the jar lightly covered during the rest of the process. Either a porous cloth or a lid resting on top of the jar will work well. Use a container with enough headspace for the mixture to rise. Additionally, place your jar in a bowl while it’s resting in case the mixture spills over.
There’s often a surge in fermentation activity during the first couple days of the process, probably caused by other yeast and bacteria that will eventually die off. When this happens, many attempting to create a sourdough starter think it has “died,” and they start over. Don’t be fooled by this lapse of activity; continue with the schedule and eventually, the desired yeast and bacteria will move in and stabilize.
The entire process is exceptionally temperature-dependent. By keeping the contents of the jar around (26°C), you’ll ensure a favourable environment and speed things up dramatically. If you have a home dough proofer (which I highly recommend) or a yogurt maker, this would be the time to turn it on. If not, a home oven, turned off, with the light on the inside (and a thermometer to monitor the temperature) will work well.
Before we begin, let’s round up a few necessary materials.
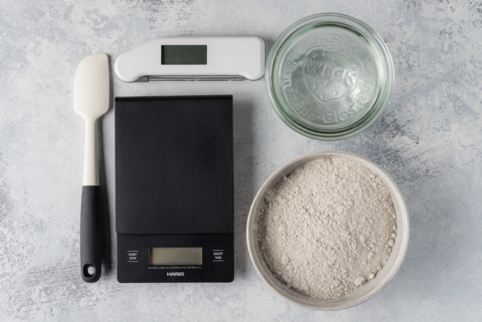
Weck Glass Jar
Have at least two clean jars on hand. Also, using the glass lid without the provided rubber seal & clips provides just enough of a seal to keep moisture and heat trapped inside. Glass is handy because it’s nice to assess the fermentation progress visually. Visible bubbles and the smell of your starter are the two cues we will rely on throughout this process.
Scale
A kitchen scale is indispensable and guarantees accuracy when measuring the amount of flour needed for each starter refreshment. Measuring flour by volume is inherently imprecise as the amount of flour packed into a measuring cup can vary. Further, it’s a good idea to get used to using a scale for weighing ingredients as this will improve your baking consistency.
Rye Flour
Using whole grain Rye flour helps expedite this process. Rye flour is teeming with extra nutrients that help kickstart the entire process. If you don’t have rye flour, a good quality organic whole wheat will also work well.
Unbleached, All-Purpose, White Flour
I mix 50% all-purpose with 50% rye flour for my feedings. You could also feed with 100% rye flour with no problem.
Silicone Spatula
I use a small, firm spatula to do my feedings; it’s sturdy and easy to clean with a sponge, and if things get messy, you can run it through the dishwasher.
ThermometerAn instant-read thermometer will help monitor the temperature of your starter and ensure it’s in the optimal range for increasing fermentation activity.
The Daily Rise And Fall Of A Sourdough Starter
In the beginning, your starter feedings will occur just once a day. As your culture becomes more active, you’ll increase this to twice a day and eventually stop using rye flour altogether (if desired). Because of the frequency of these feedings, one of my goals is to help you set things up so it’s quick and easy to do your feedings and move on with your day. Once you get the hang of things, you only need about 5-10 minutes per day to keep your starter going, no biggie.
A sourdough starter is a very resilient. If you forget to feed it one day or feed it several hours after it needed a refreshment, don’t worry, in almost all cases it will spring back.
The following schedule will provide you with a reliable and robust sourdough starter in about 6-9 days. Once you have the culture stable, it will last indefinitely as long as you refresh it regularly. If you don’t plan to bake frequently, you can toss the starter in the fridge and feed it only once a week.
Your schedule will follow the natural rise and fall of your starter. As soon as you feed it, the yeast and bacteria in your culture will begin to metabolize the sugars in the flour, creating gasses (among other things) as a byproduct. These gasses cause the starter to rise throughout the day as seen above.
Daily Feeding Process
At each feeding we will perform the following quick steps:
- Stir down your starter a little bit with your spatula
- Place a clean jar on your scale and scoop in some portion (outlined below) from the jar you just stirred down
- Add fresh flour and water, mix well to incorporate completely
- Cover the jar loosely and let rest until the next feeding
That’s it! Once you get your process down, it should take no more than a few minutes each day.
Making An Incredible Sourdough Starter From Scratch
Day One
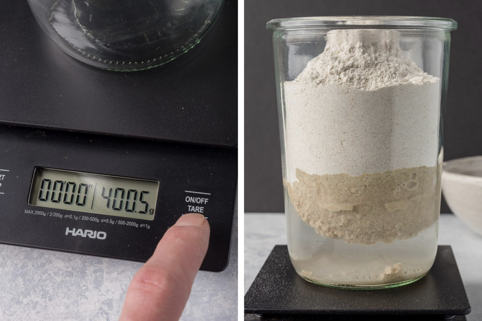
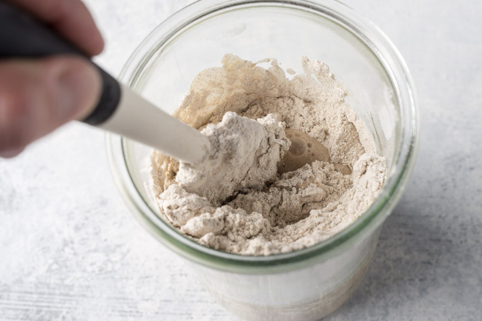
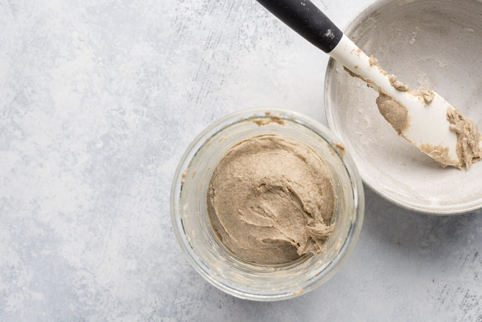
I like to use two jars for this process: each time you refresh, swap in a clean jar. Starting on Day 4, we can use the same jar: discard down and add fresh flour and water.
In the morning, place a clean, empty jar on the scale and tare. To that jar, add 100 grams whole grain rye flour and 125 grams water and mix until all dry bits are incorporated. Keep this in a warm place, 80°F to (26°C to 29°C) is ideal, and if it’s cool in your kitchen, warm the water to 80°F (26°C) before mixing. Let the mixture rest out of direct sunlight for 24 hours.
Day Two
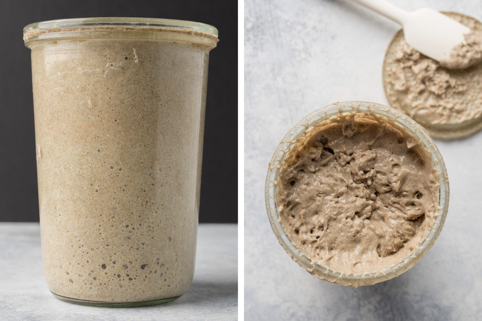
You may or may not already see some fermentation activity. As mentioned above, this potential initial surge of activity is typical and should subside around day three. What you can see below is how my initial mixture expanded significantly (in fact it bubbled out of the jar, this is why a bowl below is a good idea). At this point our starter is not yet ready to bake with, this initial surge, while encouraging, will typically disappear by the third or fourth day. Stick to the schedule, and it will come back!
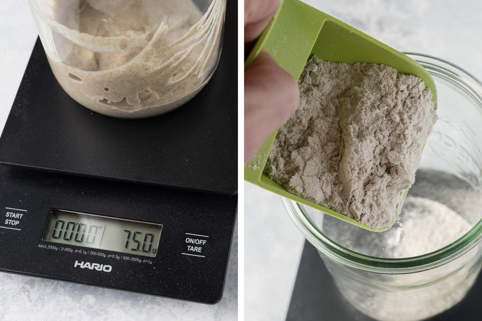
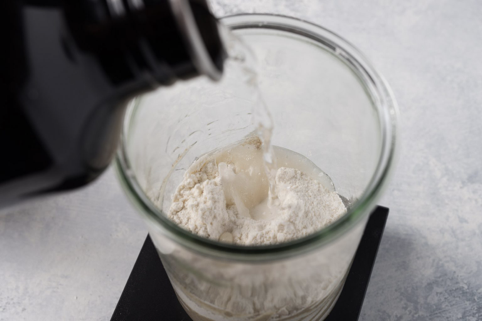
Place a second, empty jar on the scale and tare so that it reads 0 grams, scoop in 75 grams of the mixture that has been resting for 24 hours, discarding the rest. Next, add 50 grams rye flour, 50 grams all-purpose flour, and 115 grams water, again, if it’s cold, warm the water to (26°C).
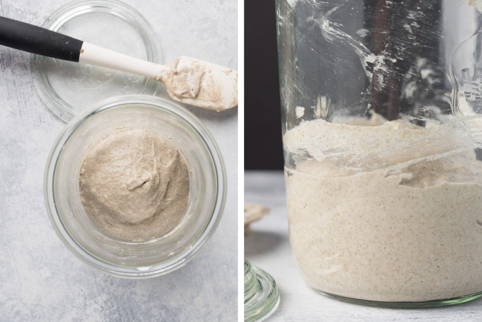
Mix well until all dry bits are incorporated, cover, and place in the same warm spot for 24 hours, until day three. Discard the rest of the mixture in the first jar and clean it in preparation for the next day.
Day Three
In the morning, you may start to see more activity, or you may see none. You can see below the initial surge of action I had in day two disappeared. However, my mixture started to show the beginning signs of beneficial yeast and bacteria taking hold.
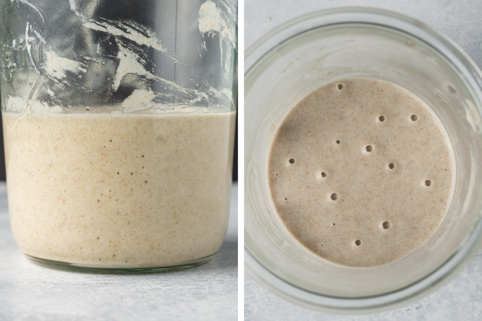
Regardless of what signs your mixture is presenting, don’t fret, stick to the schedule. Remember, if it’s cold in your kitchen warm your water to (26°C) to help speed things along.
If a layer of clear liquid forms on the top of your mixture just stir it back in and keep with the schedule.
Place a new, clean jar on the scale and tare. Scoop in 75 grams of the mixture that rested overnight and add 50 grams rye flour, 50 grams all-purpose flour, and 115 grams water. Stir until well incorporated. Cover the jar and let rest 24 hours until day four.
Discard the rest of the mixture in the first jar and clean it in preparation for the next day.
Day Four
This day is the first day of the process with two refreshments in a single day: one in the morning, and one approximately 12 hours later.
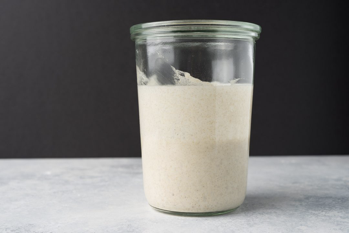
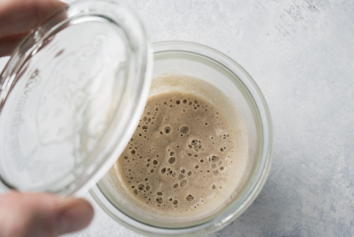
- In the morning, you should start to see (more) signs of fermentation activity if you haven’t already. There will be bubbles scattered on the sides and top, and the level of the mixture might have risen and fallen a little (evidenced by streaks on the sides of the jar).
- Refresh in the same way as on day three. Place a clean jar on the scale and tare. Scoop in 75 grams of the mixture from the jar that fermented overnight, add 50 grams rye flour, 50 grams all-purpose flour, and 115 grams water. Mix thoroughly, cover, and let rest for 12 hours.
- Discard the rest of the mixture in the first jar. From here on, simply use the same jar each day (no need to switch to a clean jar) and discard the contents down and add fresh flour and water as instructed.
- After this 12-hour rest, discard down the contents to 75 grams and refresh again with the same ratio of ingredients. Let the new mixture rest overnight.
Day Five And Six
For days five and six, continue to discard down the contents of the jar and then refresh with the same ratio of ingredients as day four, twice a day, as fermentation activity increases more and more. Keep using the same jar for these refreshments.
Day Seven And Onward
In the morning on day seven, discard what’s in the jar down to 50 grams of the mixture. To this, add 50 grams rye flour, 50 grams all-purpose flour, and 100 grams water. Mix thoroughly, cover, and let rest for 12 hours. In the evening (after about 12 hours), discard the jar contents down to 50g, add the same ratio of ingredients as earlier in the day, and let rest overnight.
At this point, you should see the height of your starter rise and fall in the jar predictably each day. This periodic behaviour is a good indicator that it is strong enough to use for your first loaf of bread. If your starter is still struggling to show activity, keep refreshing with the same ratio of ingredients for another day, or several more, until things pick up. This process can sometimes take longer, depending on the flour used and the environment (especially if it’s cool in your kitchen). Be patient and stick to the schedule!
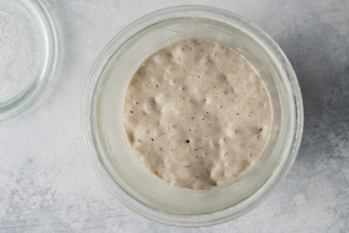
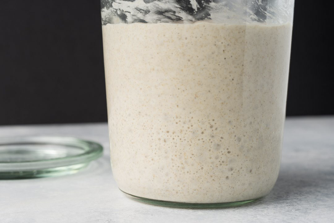
- Once you get the hang of your starter and it’s feeding schedule, feel free to adjust the ratio of ingredients. For example, in warmer months I’ll reduce my mature starter carryover to 10-20g depending on the temperature.
- The starter will continue to develop flavour and strength over the next week and into the future. With an active starter, you can now use a portion of it when “mature” (when it’s risen to maximal height) to make a leaven for any recipe here at The Perfect Loaf.
What Flour Should I Feed My Starter?
Once your starter is rising and falling predictably, it’s also okay to switch your feeding flour to suit your preference. You can continue feeding with a mixture of rye and all-purpose, turn to 100% all-purpose white flour, or even switch to using 100% whole wheat.
There is no right or wrong flour to use when feeding a starter.
Each flour choice imparts a different set of qualities to your starter and the whole grain the flour the shorter the time span between feedings. There is no right or wrong flour to use when maintaining your starter; it’s up to you and your starter!
Next Steps With A Healthy Sourdough Starter
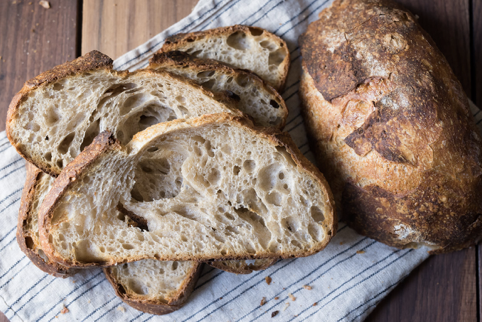
After your starter is rising and falling predictably. Based on your baking frequency, you can feed your starter once a day or use the refrigerator to slow it down. If you want to bake on the weekends or want to learn how to use the fridge to reduce your starter feedings
Final Thoughts
These days, refreshing my sourdough starter has become a liturgical part of my day. It takes minutes to provide my starter with fresh flour and water. In return, my starter produces flavourful and healthy bread. I like to think it’s me making the bread; it’s me controlling fermentation, it’s my hands mixing and shaping the dough. But the reality is, I’m just a small cog in nature’s machinery. All I need to do is lend a helping hand and stay out of the way.
Happy baking!
Taken from #theperfectloaf